Actuated Experiences: Design and Fabrication for Interactivity
Project Overview & Requirements
Your final project will be in teams of 4-5 (according to how big your section is).
In your final project we ask you to think about creating a product that is interactive (think about things that are traditionally static,
and how can me turn them into dynamic artifacts that have a purpose or functionality). Below are your final project requirements:
Fabrication
- Technique Requirement: Use at least one computer-aided fabrication method to create the prototype (ie, lasercutting, 3D printing etc).
Interaction
- Dynamic System: Incorporate at least one form of dynamic and programmable change in the system, such as mechanical, visual, electrical, or tactile.
Electronics
- Arduino & Components: Must include an Arduino and other electronic components (like sensors) to enable interaction.
Polished Finish
- Professional Appearance: Ensure the prototype has a refined look with no exposed wires, burnt edges, or sharp corners (unless they serve a design purpose). The prototype must be fully assembled and ready for presentation.
Deliverable
- Live Demo Video: Submit a live demonstration with a video that showcases the prototype in action with an explanation of its features (we will also showcase this on demo day).
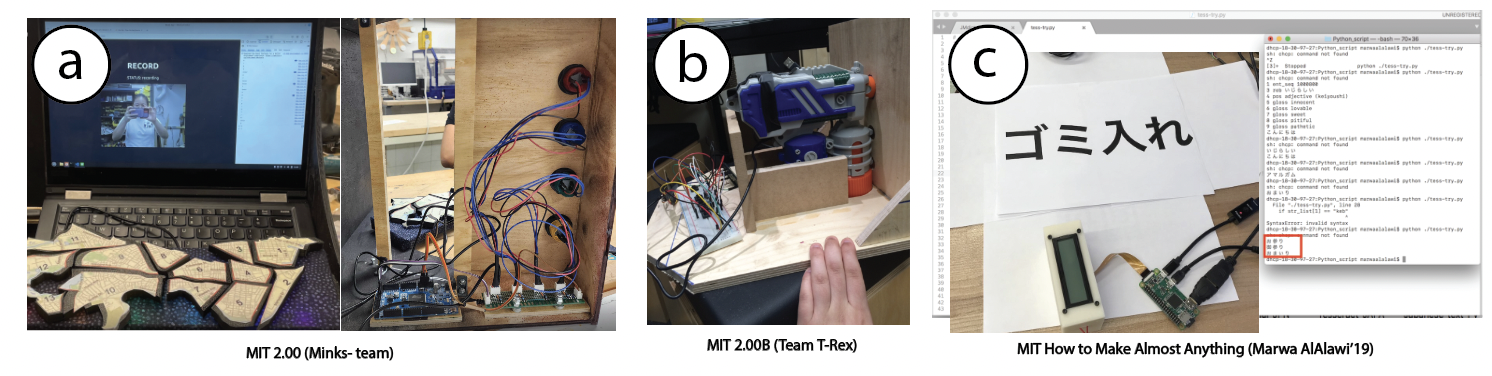
Demo Day Setup & Options (Must be Present!)
- Demonstration Options: Consider the following three ways to showcase your prototype:
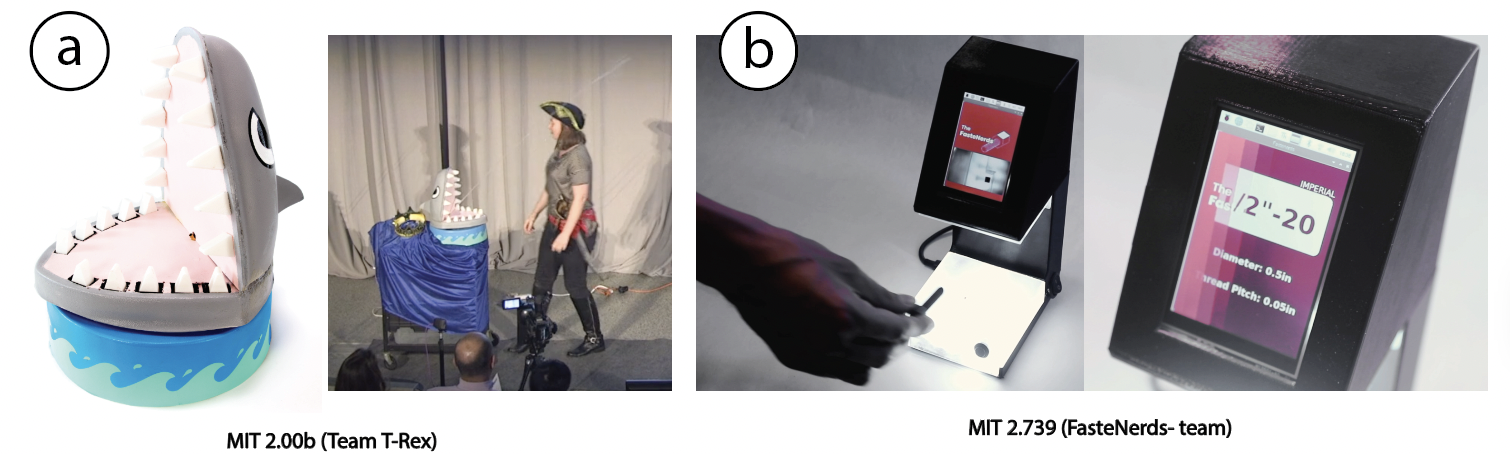
- Guest Interaction (Best): Allow guests to interact directly with the prototype.
- Presenter Interaction (Good): You demonstrate the system’s functionality while guests observe.
- Non-Interactive Display (Acceptable): Provide samples, a video, and a process overview without direct interaction.
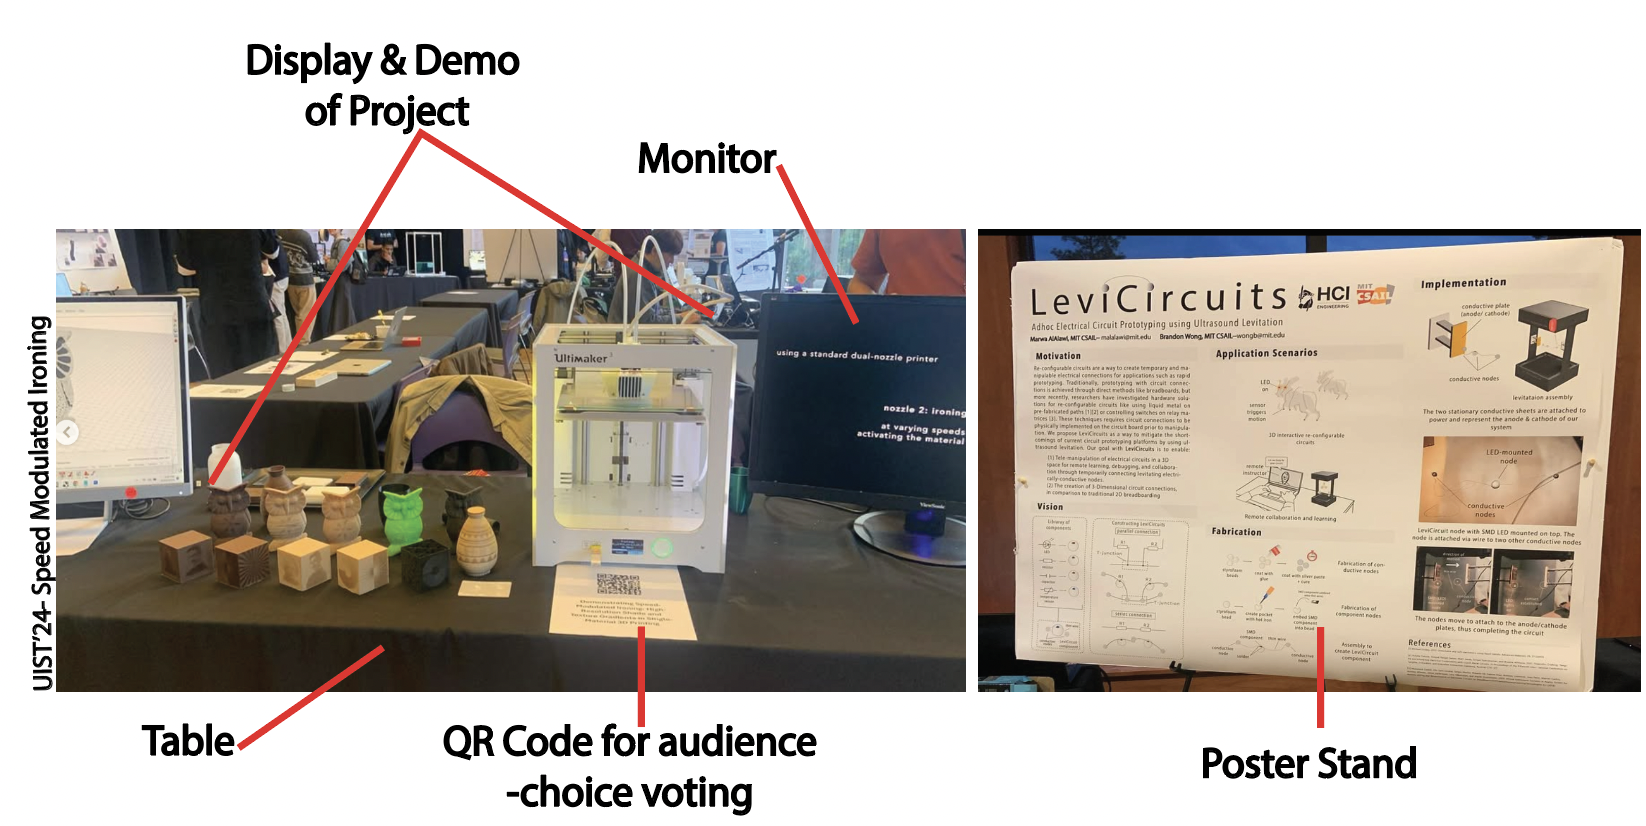
- Display Requirements:
- Set up a screen (laptop or monitor) for video playback.
- Place a poster behind the demo area.
- Arrange a table to present the prototype, aligned with the selected demonstration approach.
Brainstorming Marathon
In this class, we will follow a brainstorming marathon format to pick ideas for our final project, and this would be the basis for forming groups later on.
- 3 Idea Brainstorming : Brainstorm 20 Ideas on your own, then upload your best 3 with a representative image on the following google forms:
- Idea Scoring : Score the ideas of your classmates (and yourself) on a scale of 1-5. You may scale multiple ideas as 5 etc:
- Idea Ranking Preference : Rank pereferences from 1-5 for the top ideas in class. We will try our best to have everyone get their first choice selections.
Milestone 1
Prepare a detailed sketch of your project and project plan. While this can of course evolve, the core idea should not pivot much for your proposal. Be ready to answer engineering review questions from your classmates and instructors. Your deliverable is as follows:
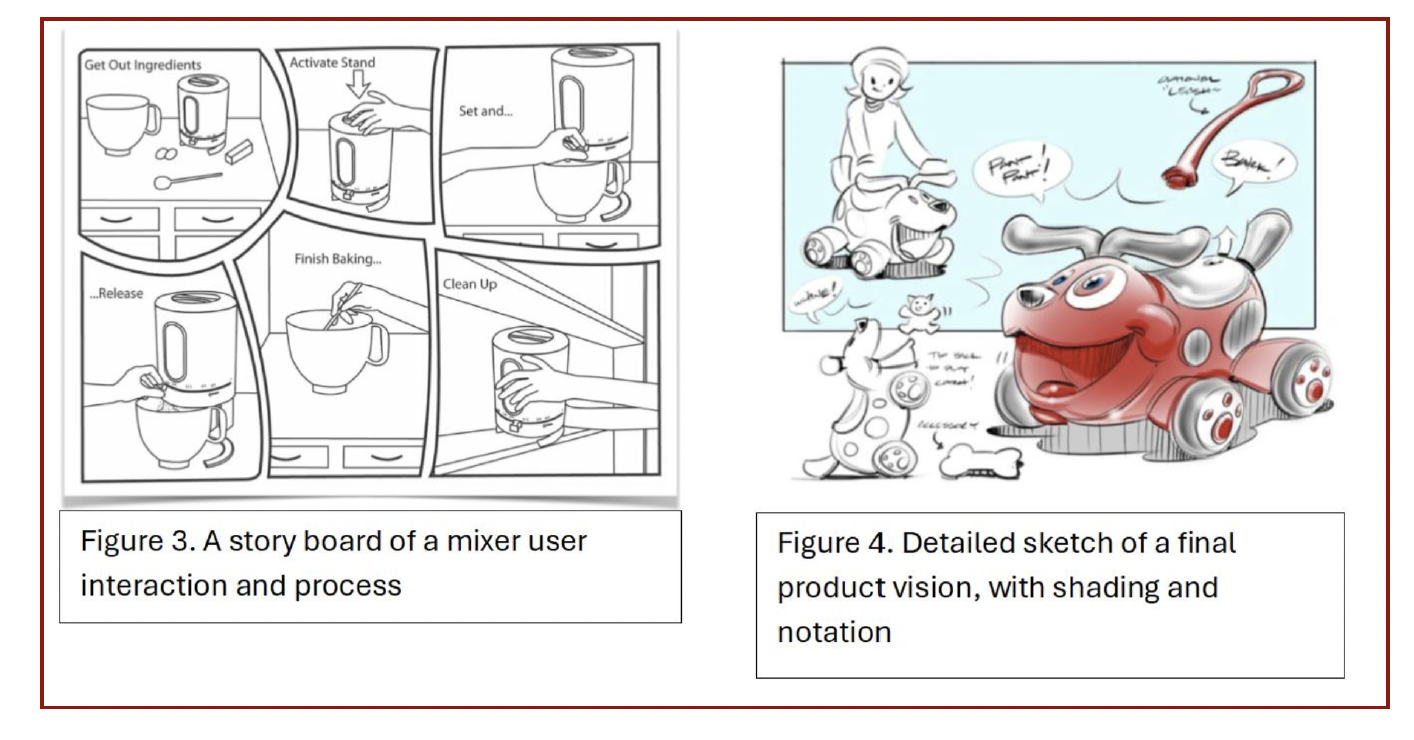
- Detailed Sketch of Product Looks-like & Components : # Parts in Product, Intended electronics to use in the product, Proposed Looks Like (Figure-4)
- Intended Working Principle : Draw a User-Interaction Story and detail the type of interaction the product has (Figure-3)
- Proposed Fabrication Methods: For each part highlight wherther you will make from scratch, use off-the-shelf components, or reverse engineer an existing part for
- Proposed Dimensions : Will this be room-scale or fit a human hand grip?
- Proposed Bill of Materials : What materials will you use (hardware and software)-- Need general numbers for main components
- Uncertainties : What might not work? What is the most important question to answer first?
- Project Plan : Preliminary list of tasks that need to be done for the project to be completed within time-frame
Milestone 2
Prepare a parametrically updatable 3D model of your project idea. The goal is that this 3D model would be useful for fabrication. It shouldn't just serve an aestehtic purpose. Be ready to answer engineering review questions from your classmates and instructors. Your deliverable is as follows:
- Fusion360 Model: Need to be paramertric with defined constraints (refer to Lab-2 and Lab-4)
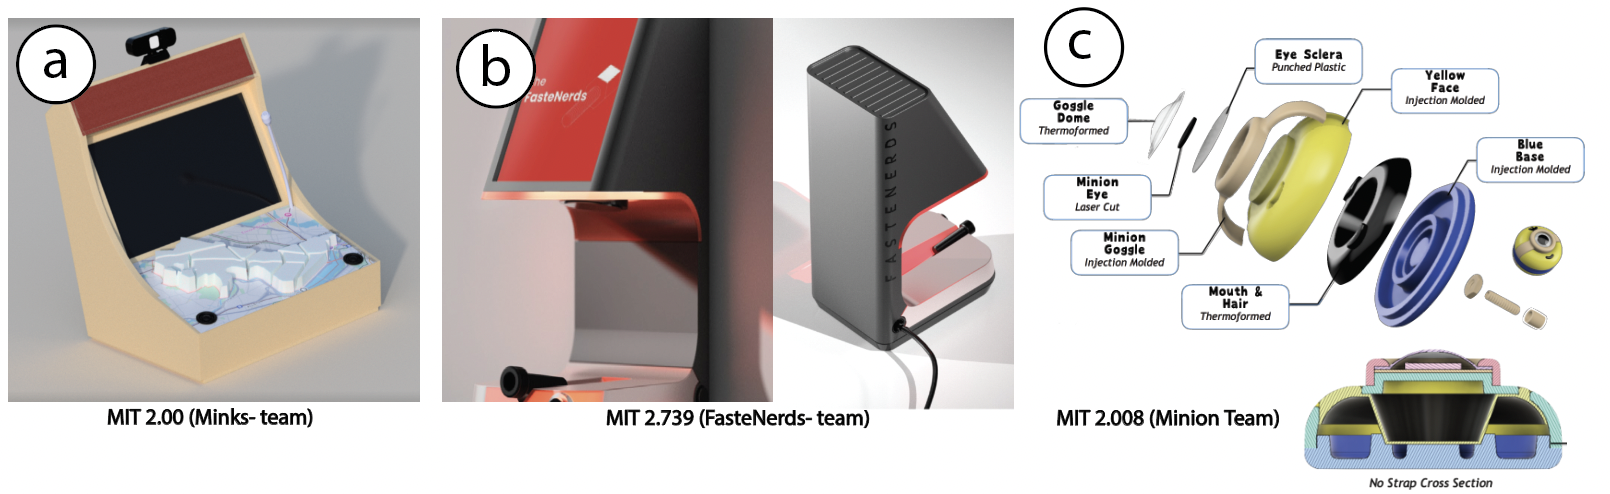
- Professional Render Screenshots: Render Screenshots from at least 3 main views for your part (material assignment and color)
- Section View/ Exploded Views: Multiple screenshots for each (Figure-b, Figure-c)
Milestone 3
Deliverable is an in-class check-in with one of your instructirs to see that your main Electronic Circuit or Prototype of Main Interaction is functional.
Final Presentation
See Final Project Overview and Requirements above.
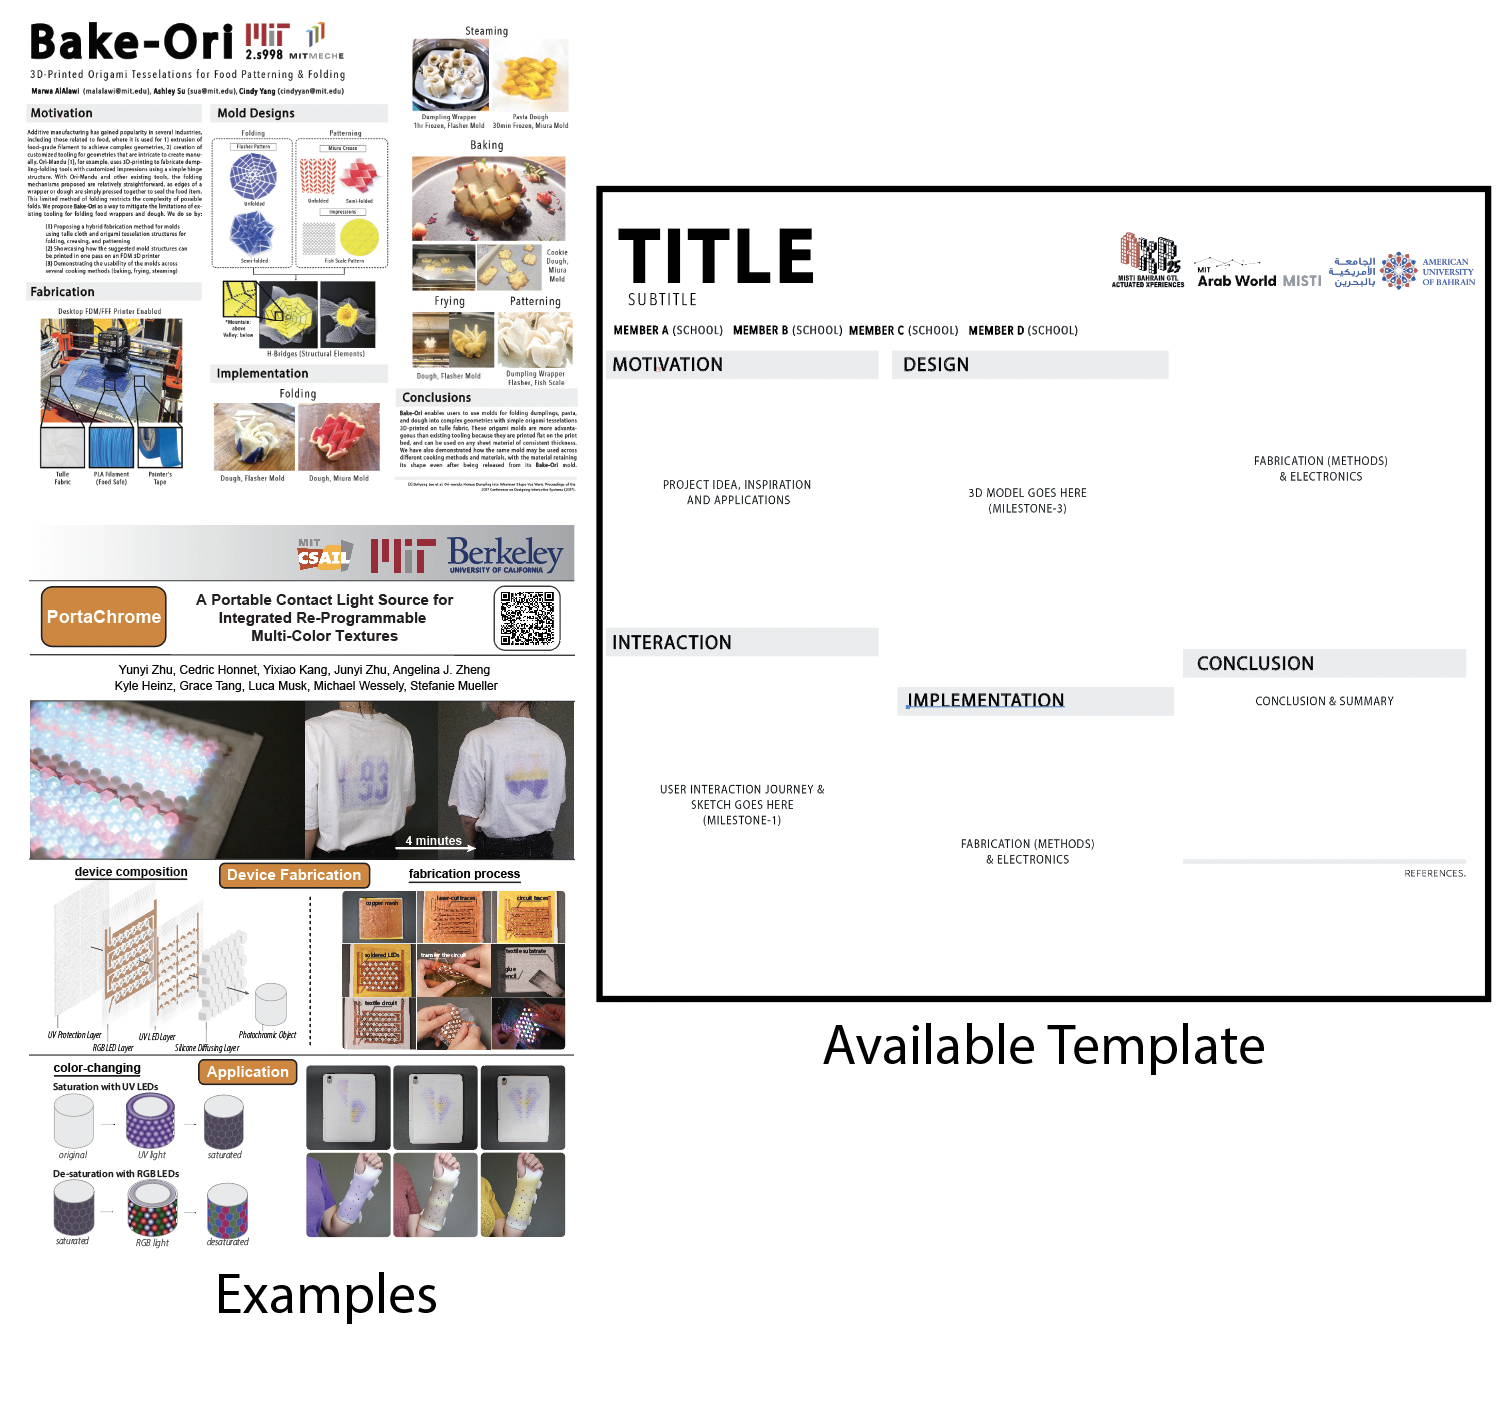
You will also need to prepare a poster. You are expected to consolidate all milestones into one poster to showcase the process leading to the final project. Poster templates will be made available but you have the creative freedom to design your own posters as long as they follow poster guidelines. Poster size is 116cm x 86.5cm
Get Poster Template hereInspiration for Projects
Coming Soon...! 🔜
Instructor Recommended Resources
Coming Soon...! 🔜